UI Extensions With Other Frameworks
Although the Admin UI is an Angular app, it is possible to create UI extensions using any web technology - React, Vue, plain JavaScript, etc.
For working examples of a UI extensions built with Vue and React, see the real-world-vendure ui extensions
There is still a small amount of Angular “glue code” needed to let the compiler know how to integrate your extension, so let’s take a look at how this is done.
1. Install @vendure/ui-devkit
To create UI extensions, you’ll need to install the @vendure/ui-devkit package. This package contains a compiler for building your customized version of the Admin UI, as well as the Angular dependencies you’ll need to create your extensions.
yarn add @vendure/ui-devkit

# or

npm install @vendure/ui-devkit
2. Create the folder structure
In this example, we will work with the following folder structure, and use Create React App our example.
/src
├─ui-extension/
     ├─ modules/
     |      ├─ react-extension.module.ts
     ├─ react-app/
            ├─ (create react app directory)
3. Create an extension module
Here’s the Angular code needed to tell the compiler where to find your extension:
// ui-extension/modules/react-extension.module.ts

import { NgModule } from '@angular/core';
import { RouterModule } from '@angular/router';
import { hostExternalFrame } from '@vendure/admin-ui/core';

@NgModule({
  imports: [
    RouterModule.forChild([
      hostExternalFrame({
        path: '',

        // You can also use parameters which allow the app
        // to have dynamic routing, e.g.
        // path: ':slug'
        // Then you can use the getActivatedRoute() function from the
        // UiDevkitClient in order to access the value of the "slug"
        // parameter.

        breadcrumbLabel: 'React App',
        // This is the URL to the compiled React app index.
        // The next step will explain the "assets/react-app" path.
        extensionUrl: './assets/react-app/index.html',
        openInNewTab: false,
      }),
    ]),
  ],
})
export class ReactUiExtensionModule {}
Note: If you are using Create React App, you should additionally update your package.json file to include the homepage property so that it works when run from the admin ui assets directory:
"homepage": "/admin/assets/react-app/"
4. Define the AdminUiExtension config
Next we will define an AdminUiExtension object which is passed to the compileUiExtensions() function in your Vendure config:
// vendure-config.ts
import path from 'path';
import { VendureConfig } from '@vendure/core';
import { AdminUiPlugin } from '@vendure/admin-ui-plugin';
import { compileUiExtensions } from '@vendure/ui-devkit/compiler';

export const config: VendureConfig = {
  // ...
  plugins: [
    AdminUiPlugin.init({
      route: "admin",
      port: 3002,
      app: compileUiExtensions({
        outputPath: path.join(__dirname, '../admin-ui'),
        extensions: [{
          // Points to the path containing our Angular "glue code" module
          extensionPath: path.join(__dirname, 'ui-extension/modules'),
          ngModules: [
            {
              // We want to lazy-load our extension...
              type: 'lazy',
              // ...when the `/admin/extensions/react-ui`
              // route is activated
              route: 'react-ui',
              // The filename of the extension module
              // relative to the `extensionPath` above
              ngModuleFileName: 'react-extension.module.ts',
              // The name of the extension module class exported
              // from the module file.
              ngModuleName: 'ReactUiExtensionModule',
            },
          ],
          staticAssets: [
            // This is where we tell the compiler to copy the compiled React app
            // artifacts over to the Admin UI's `/static` directory. In this case we
            // also rename "build" to "react-app". This is why the `extensionUrl`
            // in the module config points to './assets/react-app/index.html'.
            { path: path.join(__dirname, 'ui-extension/react-app/build'), rename: 'react-app' },
          ],
        }],
        devMode: true,
      }),
    }),
  ]
}
5. Build your extension
To ensure things are working we can now build our React app by running yarn build in the react-app directory. This will build and output the app artifacts to the react-app/build directory - the one we pointed to in the staticAssets array above.
Once build, we can start the Vendure server.
The compileUiExtensions() function returns a compile() function which will be invoked by the AdminUiPlugin upon server bootstrap. During this compilation process, a new directory will be generated at /admin-ui (as specified by the outputPath option) which will contains the un-compiled sources of your new Admin UI app.
Next, these source files will be run through the Angular compiler, the output of which will be visible in the console.
Note: The first time the compiler is run, an additional step (compatibility compiler) is run to make sure all dependencies work with the latest version of Angular. This step can take up to a few minutes.
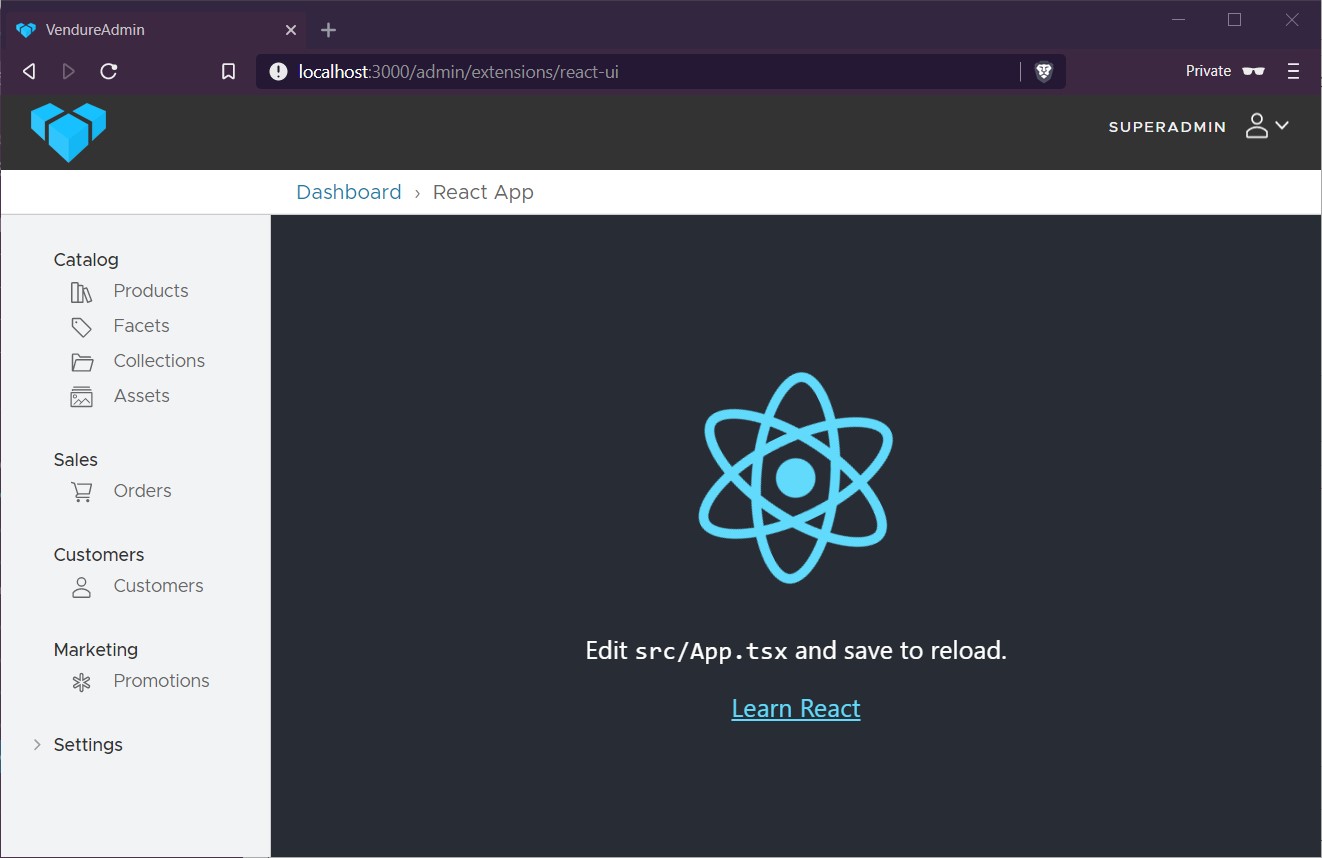
Now go to the Admin UI app in your browser and log in. You should now be able to manually enter the URL http://localhost:3000/admin/extensions/react-ui and you should see the default Create React App demo page:
Integrate with the Admin UI
Styling
The @vendure/admin-ui package (which will be installed alongside the ui-devkit) provides a stylesheet to allow your extension to fit visually with the rest of the Admin UI.
If you have a build step (as in our Create React App example), you can import it into your app like this:
// src/ui-extension/react-app/src/App.tsx
import '@vendure/admin-ui/static/theme.min.css';
If your extension does not have a build step, you can still include the theme stylesheet as a local resource:
<!-- src/ui-extension/plain-js-app/index.html -->
<head>
  <link rel="stylesheet" href="../../theme.min.css" />
</head>
UiDevkitClient
The @vendure/ui-devkit package provides a number of helper methods which allow your extension to seamlessly interact with the underlying Admin UI infrastructure, collectively known as the UiDevkitClient. The client allows your extension to:
- Make GraphQL queries & mutations, without the need for your own HTTP or GraphQL client, with full integration with the Admin UI client-side GraphQL cache.
- Display toast notifications.
setTargetOrigin
The UiDevkitClient uses the browser’s postMessage API to communicate between the Admin UI app and your extension. For security reasons this communication channel is restricted to a specific domain (where your extension app will be running from). To configure this, use the setTargetOrigin function:
import { setTargetOrigin } from '@vendure/ui-devkit';

setTargetOrigin('http://my-domain.com');
If this is mis-configured you will see an error along the lines of “Failed to execute ‘postMessage’ on ‘DOMWindow’”.
For apps with a build step, you can use these functions like this:
import { graphQlMutation, notify } from '@vendure/ui-devkit';

// somewhere in your component
const disableProduct = (id: string) => {
  graphQlMutation(`
    mutation DisableProduct($id: ID!) {
      updateProduct(input: { id: $id, enabled: false }) {
        id
        enabled
      }
    }`, { id }).then(result => {
     notify({
       message: 'Updated Product',
     });
  })
}
If your extension does not have a build step, you can still include the UiDevkitClient as a local resource, which will expose a VendureUiClient global object:
<!-- src/ui-extension/plain-js-app/index.html -->
<head>
  <script src="../devkit/ui-devkit.js"></script>
</head>
<script>
  const disableProduct = id => {
    VendureUiClient.graphQlMutation(`
      mutation DisableProduct($id: ID!) {
        updateProduct(input: { id: $id, enabled: false }) {
          id
          enabled
        }
      }`, { id }).then(result => {
       VendureUiClient.notify({
         message: 'Updated Product',
       });
    })
  }
</script>
Next Steps
Now you have created your extension, you need a way for your admin to access it. See Adding Navigation Items