Customizing the Order Process
Vendure defines an order process which is based on a finite state machine. This means that the Order.state property will be one of a set of pre-defined states. From the current state, the Order can then transition (change) to another state, and the available next states depend on what the current state is.
So, as an example, all orders begin in the AddingItems state. This means that the Customer is adding items to his or her shopping cart. From there, the Order can transition to the ArrangingPayment state. A diagram of the default states and transitions can be found in the Order Workflow guide.
Defining custom states and transitions
Sometimes you might need to modify the default Order process to better match your business needs. This is done by defining one or more CustomOrderProcess objects and passing them to the OrderOptions.process config property.
Example: Adding a new state
Let’s say your company can only sell to customers with a valid EU tax ID. We’ll assume that you’ve already used a custom field to store that code on the Customer entity.
Now you want to add a step before the customer handles payment, where we can collect and verify the tax ID.
So we want to change the default process of:
AddingItems -> ArrangingPayment
to instead be:
AddingItems -> ValidatingCustomer -> ArrangingPayment
Here’s how we would define the new state:
// customer-validation-process.ts
import { CustomOrderProcess } from '@vendure/core';

export const customerValidationProcess: CustomOrderProcess<'ValidatingCustomer'> = {
  transitions: {
    AddingItems: {
      to: ['ValidatingCustomer'],
      mergeStrategy: 'replace',
    },
    ValidatingCustomer: {
      to: ['ArrangingPayment', 'AddingItems'],
    },
  },
};
This object means:
- the
AddingItemsstate may only transition to theValidatingCustomerstate (mergeStrategy: 'replace'tells Vendure to discard any existing transition targets and replace with this one). - the
ValidatingCustomermay transition to theArrangingPaymentstate (assuming the tax ID is valid) or back to theAddingItemsstate.
And then add this configuration to our main VendureConfig:
// vendure-config.ts
import { VendureConfig } from '@vendure/core';
import { customerValidationProcess } from './customer-validation-process';

export const config: VendureConfig = {
  // ...
  orderOptions: {
    process: [customerValidationProcess],
  },
};
To add multiple new States you need to extend the generic type like this:
import { CustomOrderProcess } from '@vendure/core';

export const customerValidationProcess: CustomOrderProcess<'ValidatingCustomer'|'AnotherState'> = {...}
This way multiple custom states gets defined.
Example: Intercepting a state transition
Now we have defined our new ValidatingCustomer state, but there is as yet nothing to enforce that the tax ID is valid. To add this constraint, we’ll use the onTransitionStart state transition hook.
This allows us to perform our custom logic and potentially prevent the transition from occurring. We will also assume that we have a provider named TaxIdService available which contains the logic to validate a tax ID.
// customer-validation-process.ts

// We declare this in the outer scope and can then use it
// in our onTransitionStart function.
let taxIdService: TaxIdService;

const customerValidationProcess: CustomOrderProcess<'ValidatingCustomer'> = {
  transitions: {
    AddingItems: {
      to: ['ValidatingCustomer'],
      mergeStrategy: 'replace',
    },
    ValidatingCustomer: {
      to: ['ArrangingPayment', 'AddingItems'],
    },
  },

  // The init method allows us to inject services
  // and other providers
  init(injector) {
    taxIdService = injector.get(TaxIdService);
  },

  // The logic for enforcing our validation goes here
  async onTransitionStart(fromState, toState, data) {
    if (fromState === 'ValidatingCustomer' && toState === 'ArrangingPayment') {
      const isValid = await taxIdService.verifyTaxId(data.order.customer);
      if (!isValid) {
        // Returning a string is interpreted as an error message.
        // The state transition will fail.
        return `The tax ID is not valid`;
      }
    }
  },
};
TypeScript Typings
To make your custom states compatible with standard services you should declare your new states in the following way:
// types.ts
import { CustomOrderStates } from '@vendure/core';

declare module '@vendure/core' {
  interface CustomOrderStates {
    ValidatingCustomer: never;
  }
}
This technique uses advanced TypeScript features - declaration merging and ambient modules.
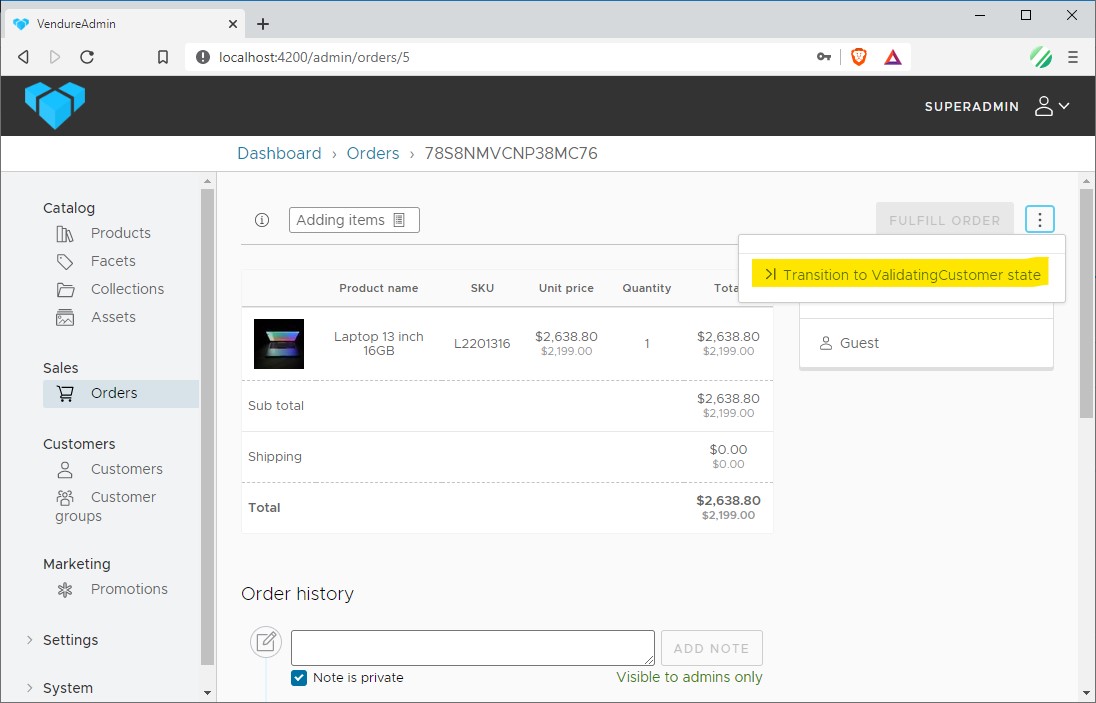
Controlling custom states in the Admin UI
If you have defined custom order states, the Admin UI will allow you to manually transition an order from one state to another: